Proxy for Minecraft
Minecraft is an incredibly popular sandbox game among users of all ages, created by Swedish programmer Markus Persson and published by his company Mojang AB. The game began its journey back in 2009, but since then its popularity has only been gaining momentum.

What is so special about this game? Everything ingenious is simple. Boundless flight of fancy successfully combined multiplayer and single-player, casualness in many moments, and complete unpredictability — all this and much more is an integral part of a great game called Minecraft.
The game has millions of fans around the world, but there are problems with access to the game and some actions with it. In general, 90% of all this can be solved using high-quality private proxies, and we will tell you how to set them up in this article.
Why do you need proxies in Minecraft?
Initially, the game involves an online connection, which means that the proxies in this game can help expand your options in the game as a player. Connecting to the game becomes anonymous, and faster, which is good news.
The main advantages of a proxy when used for the Minecraft game:
- Ignore any blocking
- Minimizing ping
- Multiple Account Control
How to set up a proxy for Minecraft?
- Find the file run.exe in the root folder of the game.
- Start text editor:
- when connecting with HTTP protocol use: java -Dhttp.proxyHost=IPPROXY-Dhttp.proxyPort=PORTPROXY-Xmx800m-jar run.exe;
- When authentication is used(Authorization via login and password): java -Dhttp.proxyHost=IPPROXY-Dhttp.proxyPort=PORTPROXY-Dproxy.User=NAMEPROXY-Dhttp.proxyPassword=PROXYPASSWORD-Xmx800m-jar run.exe;
- when connecting with SOCKS protocol use: java -DsocksProxyHost=IPPROXY-DsocksProxyPort=PORTPROXY-Xmx800m-jar run.exe.
- Save start.bat and send this file to the folder with the «run.exe» file.
- At this stage, additional software will be needed. We recommend Proxifiler. Download, install the application, and run.
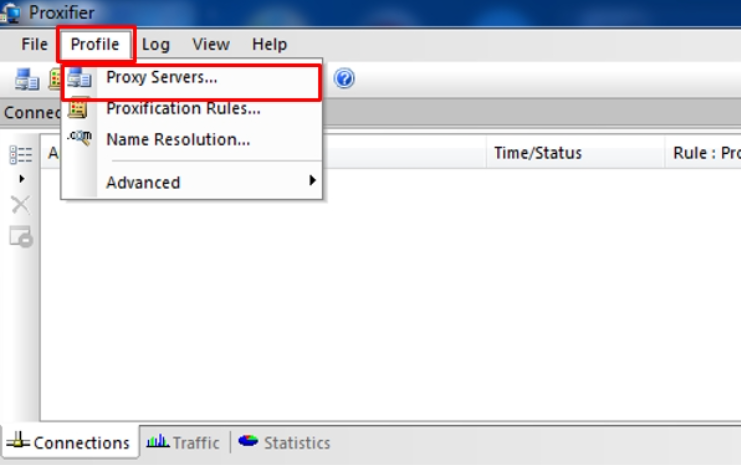
- In the context menu, pay attention to the «Profile» tab, in it go to «Proxy Server»:
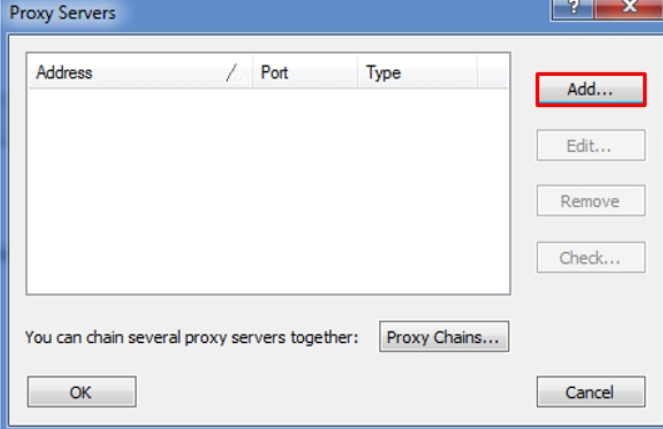
A new window will pop up, there we click on the «Add» button:
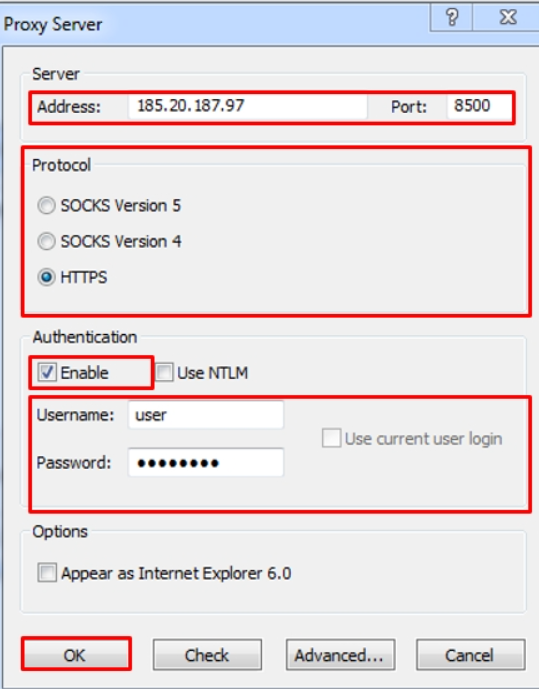
This point already needs to be taken carefully, a lot depends on it.
We see a field for the proxy address and its port, you need to enter your data there, or rather the data of your proxy server.
Immediately after these two fields, we see a section with protocols. Choose the one that your proxy uses.
The section called «Authentication» is only useful if the proxy has login and password authorization. This authorization is answered by the “Enable” button. When the checkbox is active, you will need to enter your username and password in the appropriate fields. Be sure to attach run.exe and java.exe, which are located in C:\Program Files\Java\jre6\bin, in Proxification Rules, the mark on Process Only the following is important. When all the data is entered correctly and the settings are checked, we confirm everything with the “OK” button:
Using the «Check» button, we can find out if we did everything right and whether the data was entered correctly, try using:
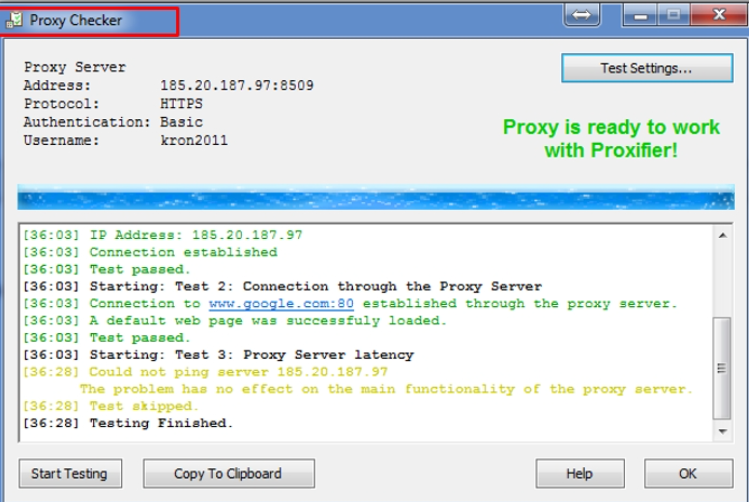
If all settings work correctly, then you can finish. It’s time to try out your work and start the game using the start.bat file.
Proxy settings should have a very positive effect on your performance in the game and its security. Have a nice game!